Conte para nós o que o seu produto precisa fazer
Escreva um parágrafo sobre o produto, o silício e o prazo. Um engenheiro que faz esse trabalho vai ler e responder para você.
Escreva, faça o build e depure um programa Hello World para a placa i.MX53, com o Eclipse e o plug-in do Yocto Project.
Publicamos este artigo no nosso primeiro blog. Algumas versões, links e passos dele estão desatualizados.
Assuming you’ve configured your environment correctly (you’ve installed eclipse, its plugins, the toolchain and the sysroot on the development machine; on the target machine booted the filesystem successfully), creating an application is as easy as the following steps:
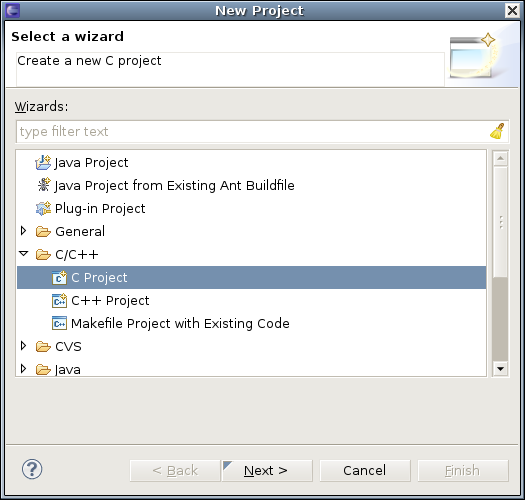
Open Eclipse, on the menubar, click on “File” -> “New” -> “Project…”;
select “C Project”, click on “Next”;
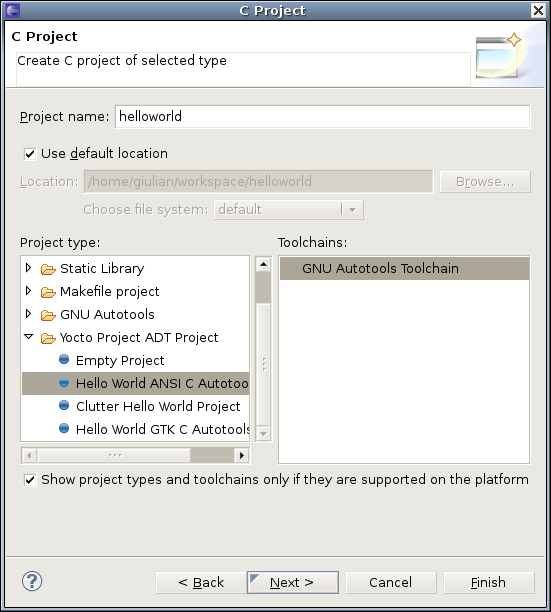
type a name for your new project;
expand the “Yocto Project ADT Project” folder;
here you could select “Empty Project” if you wish, but let’s select “Hello World ANSI C Autotools Project”, this way Eclipse creates an Autotools project and its files and folders preconfigured. Click on “Next”;
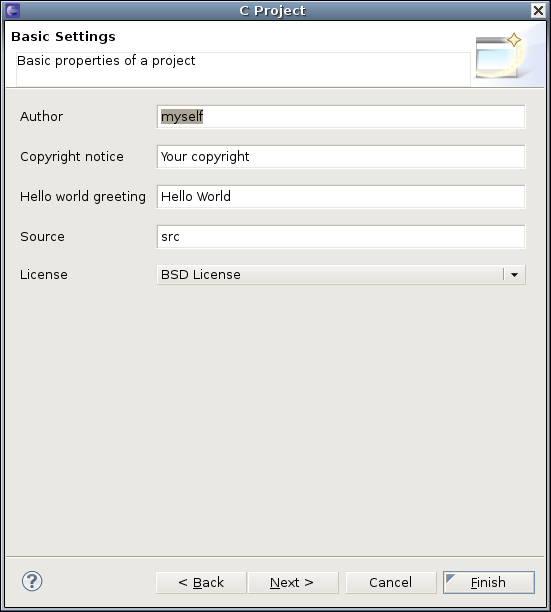
here you can set more information about the project, like: “Author”, “Copyright notice”, “Hello world greeting”, the “Source” folder and the “License”;
Fill them as you wish and click “Finish”.
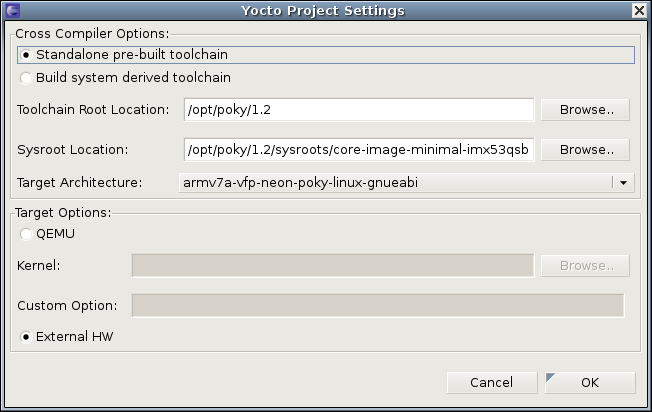
On the menubar, click on “Project”, “Change Yocto Project Settings”;
here you can check the “Toolchain” and “Sysroot” locations and the “Target architecture” as well. Change them if needed or just close the window if everything is right.
On the menubar, click on “Project”, “Reconfigure Project”. You don’t have to do this every time you build it, but only when a project configuration is changed;
on the menubar, click on “Project”, “Build Project”.
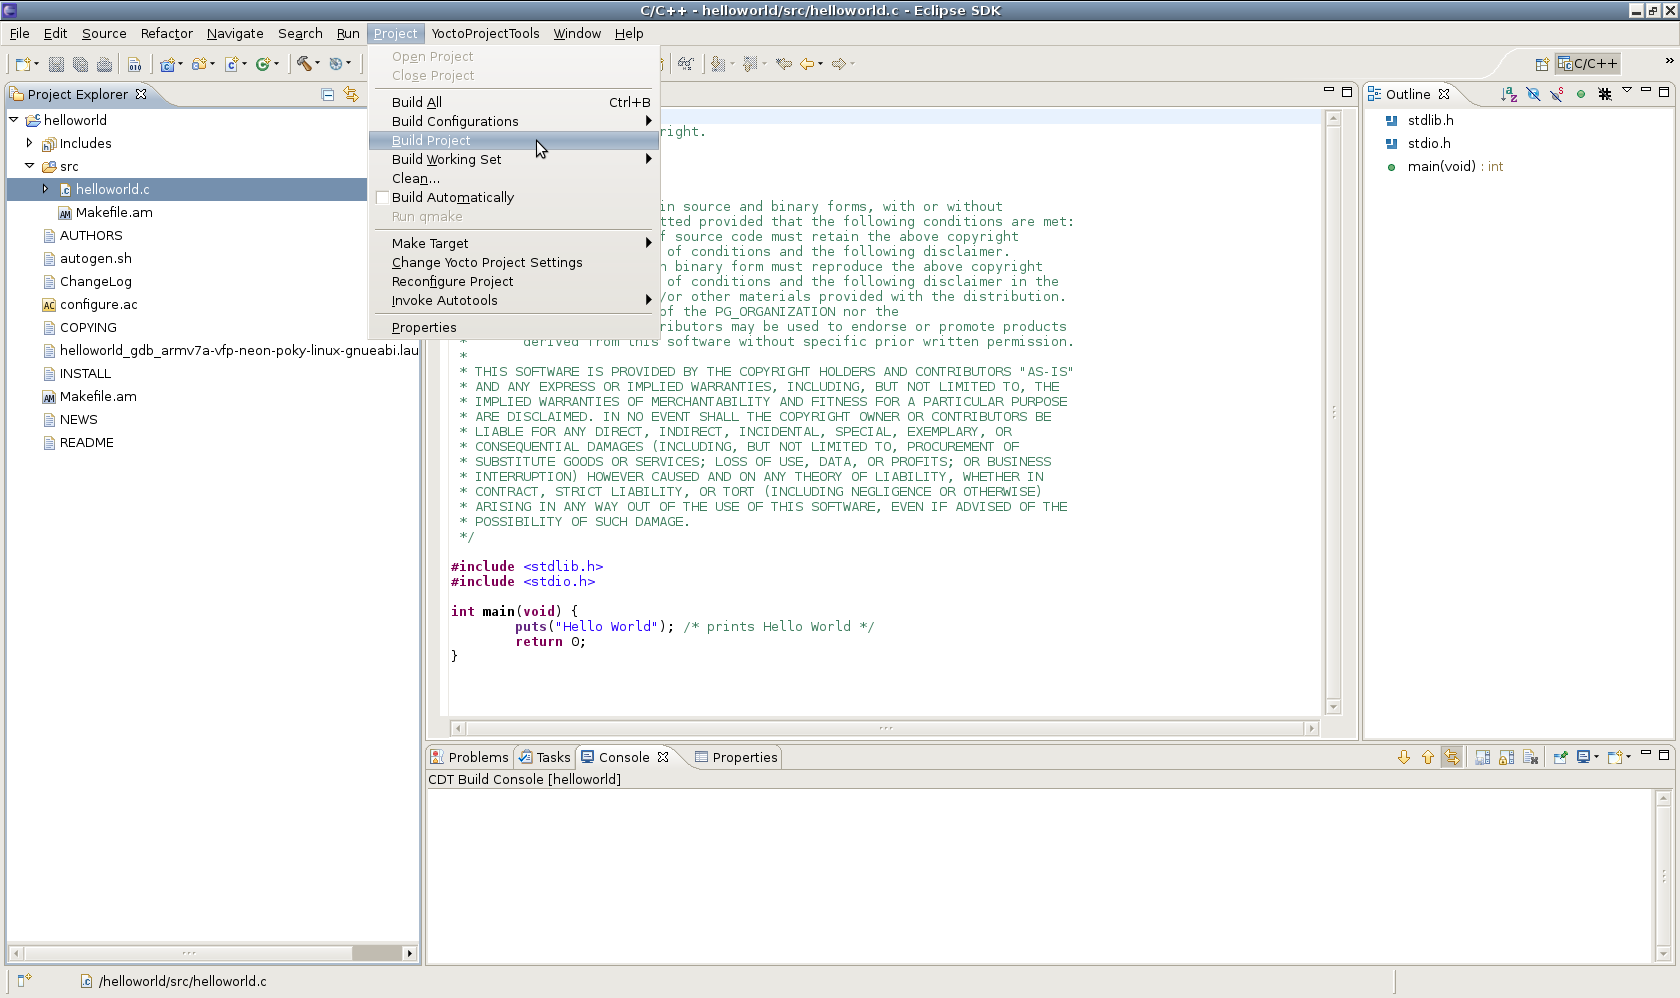
Now it’s time to test it. For the following steps, you need to setup the target device. This includes: boot the corresponding filesystem on it, have a network connection between the target device and the development machine and have started the TCF agent on the target device.
If the description above sounds simplified, it’s because it’s simple! The filesystem to be booted on the device is provided along with the toolchain and the sysroot. For the i.MX53, on the development machine you just have to do a binary copy of the filesystem to a SD card, plug the SD card on the board and power it on. To setup a valid network configuration, you can do it with a simple command (ex.: ifconfig eth0 10.9.0.1) and to start the TCF agent a single command as well (/etc/init.d/tcf-agent start).
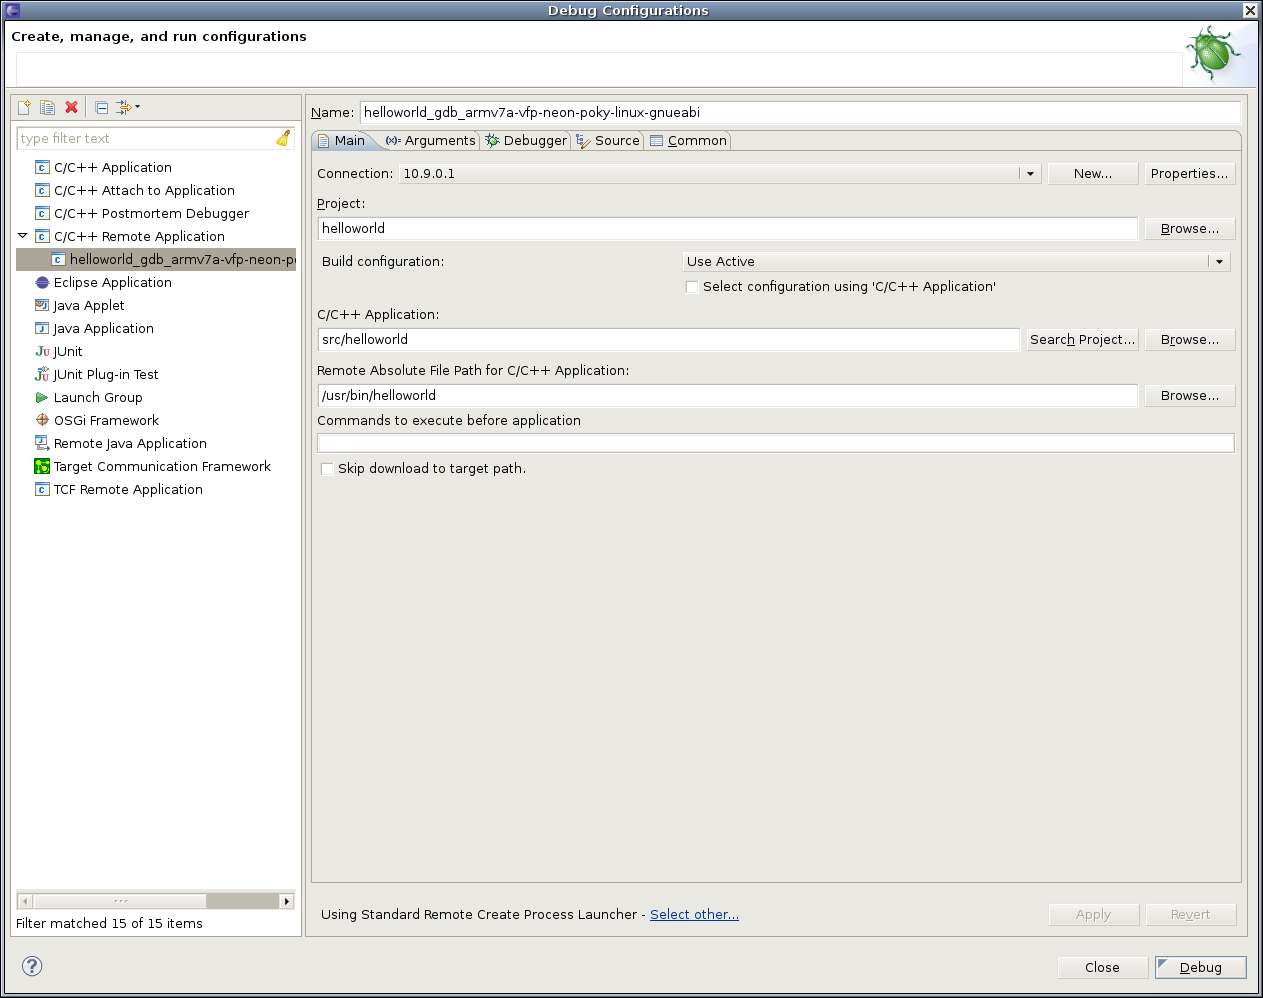
On the menubar, click on “Run”, “Debug configurations”;
on the left area, expand “C/C++ Remote Application”;
locate your project to bring the view of the Debug configurations on the right area;
at the right side of the “Connection” field, click on “New” to create a new connection with the target device;
select “TCF” which means Target Communication Framework, click on “Next”;
fill the IP address of the target device, the name of the connection and a description if desired. Click on “Finish” to create the connection;
at the “Connection” field, select the just created connection;
fill in a remote absolute path for your application, click on “Apply”;
click on “Debug”;
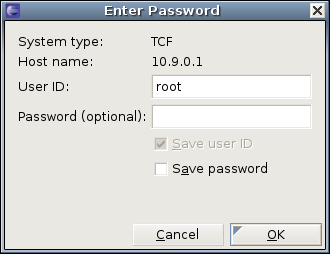
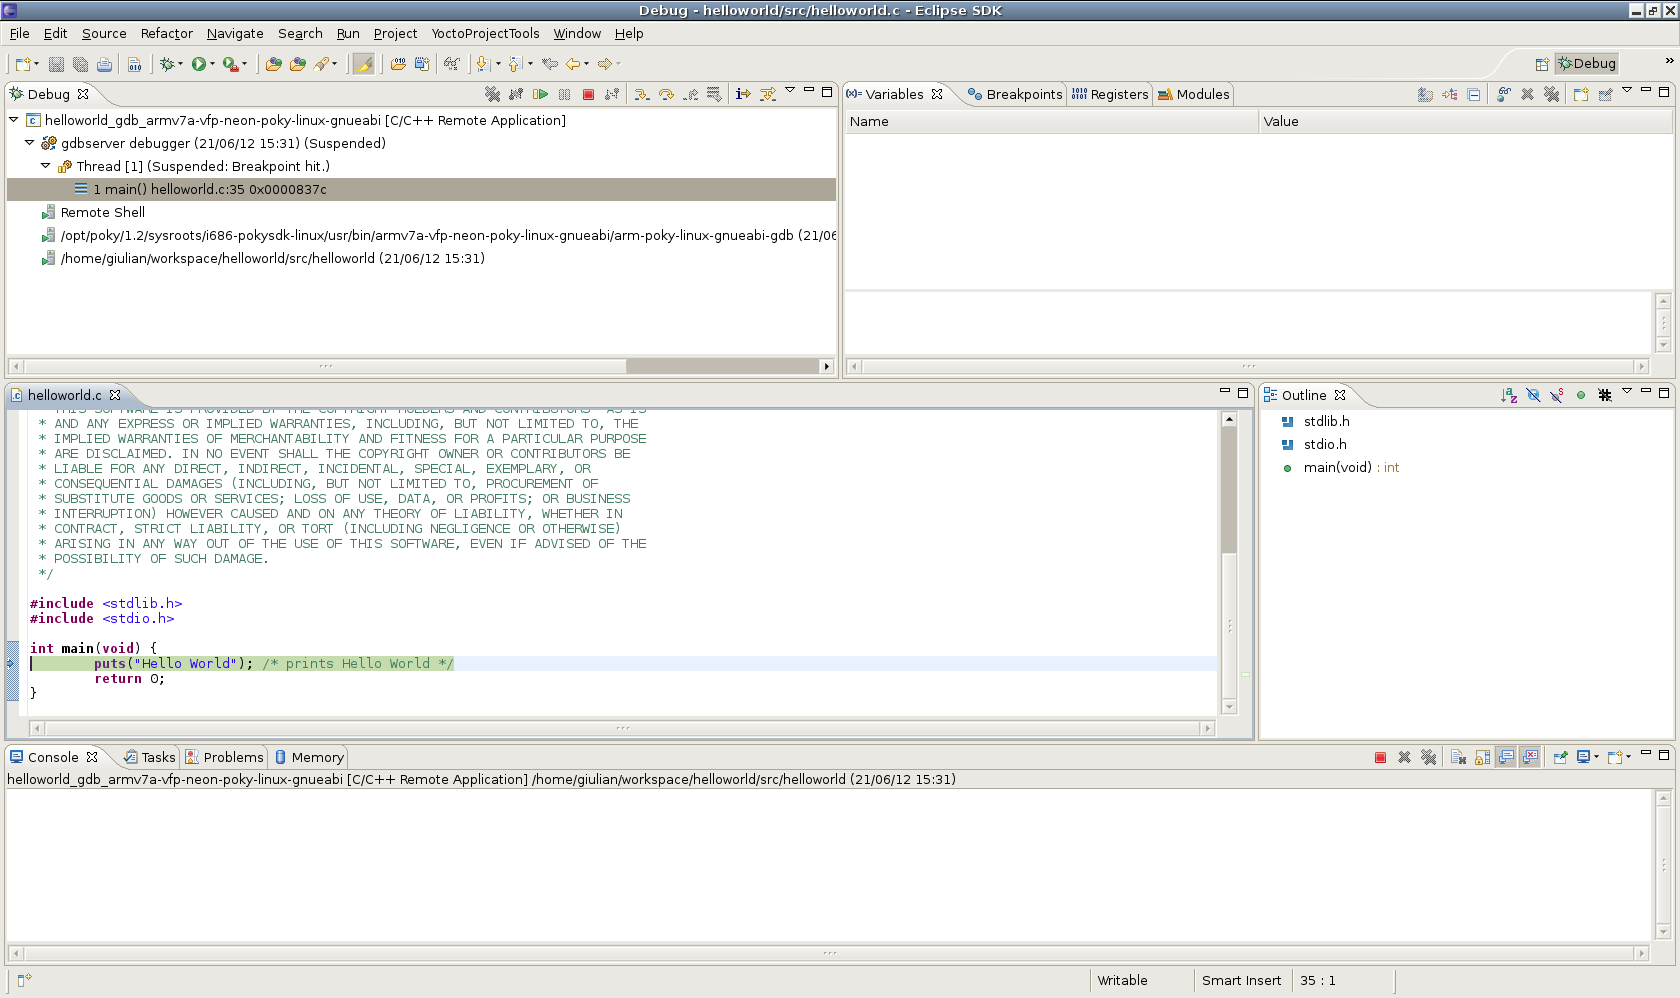
accept the debug perspective when prompted;
Your application is now running in Debug mode! Press F8 to resume it and complete the execution.
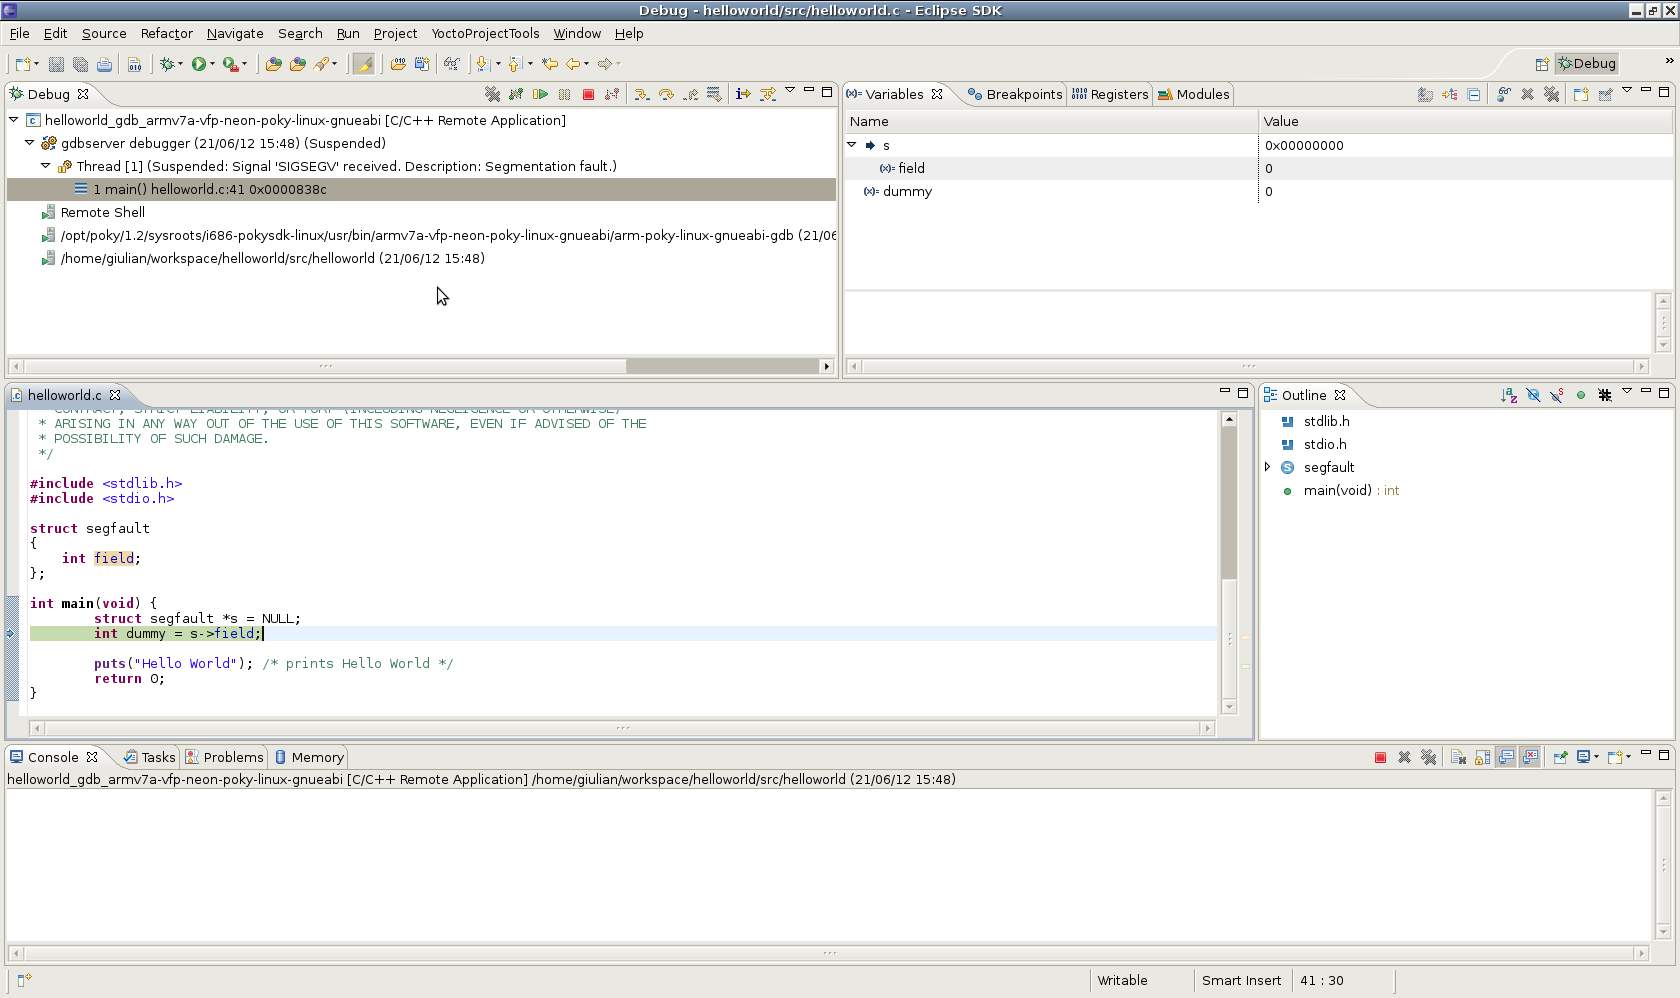
   struct segfault {
     int field;
   };
  struct segfault *s = NULL;
  int dummy = s->field;
on the menubar, click on “Project”, “Build Project”;
on the menubar, click on “Run”, “Debug Configurations”
click on “Debug”.
Escreva um parágrafo sobre o produto, o silício e o prazo. Um engenheiro que faz esse trabalho vai ler e responder para você.
Ou escreva para contato@ossystems.com.br